View your Calendar in Different Time Zones
Magenta Health
View your calendar in different time zones. See your calendar as colleagues or customers in different areas do.
Instructions
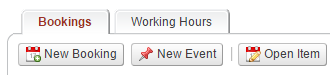
1. Select the Calendar button in the main navigation bar.

2. Select the Configure button.

3. Check and save the option of viewing your calendar in different time zones.

4. Select a time zone to view your calendar in.

The bookings and events on your calendar will now be displayed in the selected time zone.